Building A Saas App With Laravel Permission And Cashier
In this article, we will build a saas application with a subscription payment model using laravel-permission and laravel cashier (stripe).

How Do SaaS Subscriptions Work
Most SaaS applications have plans that users can subscribe to, such as "Standard Plan" and "Premium Plan" and those plans can be on a yearly or monthly base. The idea is that when a user subscribes to a plan we give them the permission to access our restricted content or service so they can use it.
How We Will Approach That
Let's say we have two plans in our application "Standard Plan" and "Premium Plan" then we will make two roles, one for standard customers and another for premium customers.
When our user buys a subscription, we give him that role so he can access the features associated with it.
Lets Code
First Part: Roles based access
First authentification.
composer require laravel/breeze --dev

php artisan breeze:install

npm install && npm run dev

php artisan migrate
Install Laravel-permission.
composer require spatie/laravel-permissionLet's add these to our $routeMiddleware array inside app/Http/Kernel.php
protected $routeMiddleware = [
    // ...
    'role' => \Spatie\Permission\Middlewares\RoleMiddleware::class,
    'permission' => \Spatie\Permission\Middlewares\PermissionMiddleware::class,
    'role_or_permission' => \Spatie\Permission\Middlewares\RoleOrPermissionMiddleware::class,
];
We need to add the HasRoles trait to our user model.
use Spatie\Permission\Traits\HasRoles;

class User extends Authenticatable
{
    use HasRoles;

    // ...
}
For more details check laravel-permission docs.
Create users, roles, and permissions
Users have roles and roles have permissions so first, let's start with creating permissions.
There are two features "tasks" and "events".
php artisan make:seeder PermissionSeeder $permissions = [
'list tasks',
'edit tasks',
'create tasks',
'delete tasks',
'list events',
'edit events',
'create events',
'delete events',
];
foreach ($permissions as $permission) {
Permission::create(['name' => $permission]);
}Next, we will create users and their roles :
There are two roles: standard-user and premium-user.
php artisan make:seeder UserSeeder// create "standard-user" Role
$standardUserRole = Role::create(['name' => 'standard-user']);
$standardPlanPermissions = array([
'list tasks',
'edit tasks',
'create tasks',
'delete tasks',
]);
// assign permissions to "standard-user" role
$standardUserRole->syncPermissions($standardPlanPermissions);
// create standard user
$standardPlanUser = User::create([
'name' => 'Standard Plan User', 'email' => 'standardplan@kbouzidi.com',
'password' => bcrypt('123456')
]);
// assign "standard-user" to the standard user
$standardPlanUser->assignRole([$standardUserRole->id])
$premiumUserRole = Role::create(['name' => 'premium-user']);
// premium-user has more more features
$premiumPlanPermissions = array([
...$standardPlanPermissions,
'list events',
'edit events',
'create events',
'delete events',
]);
$premiumUserRole->syncPermissions($premiumPlanPermissions);
$premiumPlanUser = User::create([
'name' => 'Premium Plan User', 'email' => 'premiumplan@kbouzidi.com',
'password' => bcrypt('123456')
]);
$premiumPlanUser->assignRole([$premiumUserRole->id]);Update routes/web.php
Route::get('/dashboard', function() {
  return view('dashboard', ['intent' => auth()->user()->createSetupIntent()]);
})->middleware(['auth', 'isSubscribed'])->name('dashboard');

Route::post('/subscribe', [SubscriptionController::class, 'subscribe'])
    ->middleware(['auth'])
    ->name('subscribe');

Route::name('subscribed.')
    ->middleware(['auth', 'role:standard-user|premium-user'])
    ->group(function() {
      Route::view('subscribed/dashboard', 'subscribed.dashboard')
          ->name('dashboard');
});
Let's create isSubscribed middleware
This is a custom middleware to check if a user is subscribed then we will redirect him to his section.
php artisan make:middleware RedirectIfSubscribedInside the handle method we will add this code :
if ($request->user() &&
    ($request->user()->subscribed('standard') ||
     $request->user()->subscribed('premium'))) {
  return to_route('subscribed.dashboard');
}
Register the middleware in app\Http\kernel.php likewise :
   protected $routeMiddleware = [
 	 //
        'isSubscribed' => RedirectIfSubscribed::class,
    ];
Redirect after login
in AuthenticatedSessionController in the store method add
$request->authenticate();

$request->session()->regenerate();
// add this
if ($request->user()->hasRole('standard-user') ||
    $request->user()->hasRole('premium-user')) {
  return redirect()->intended(route('subscribed.dashboard'));
}

return redirect()->intended(RouteServiceProvider::HOME);
Let's create the views

Second part: Subscription Billing
Install laravel-cashier
composer require laravel/cashier
php artisan migrate
Add the Billable trait to the user model.
use Spatie\Permission\Traits\HasRoles;
use Laravel\Cashier\Billable;

class User extends Authenticatable
{
    use Billable,HasRoles
}
Make sure to update your .env file.
STRIPE_KEY=your-stripe-key
STRIPE_SECRET=your-stripe-secret
Let's make money 🤑💸
First, create some products, you can do that from the stripe dashboard, check this guide (link).
make sure to choose recurring prices.
You should have two plans, premium and standard each plan has two recurring prices yearly ad monthly.
Now we can set up a controller to accept user subscriptions.
php artisan make:controller SubscriptionControllerAdd a method to handle user subscription
// you can move this to a database table
private $plans = array(
    'standard_monthly' => 'price_1KpyUHEpWs7pwp46NqoIW3dr',
    'standard_annually' => 'price_1KpyUHEpWs7pwp46bvRJH9lM',
    'premium_monthly' => 'price_1KpyYdEpWs7pwp46q31BU6vT',
    'premium_annually' => 'price_1KpyYdEpWs7pwp46iGRz3829',
);

public function subscribe(Request $request) {
  // this is a demo make sure to add some validation logic

  $user = auth()->user();


  $planeName =
      in_array($request->planId, ['standard_monthly', 'standard_annually']) ?
      'standard' :
      'premium';

  // check if the user already have subscribed to the plan
  if ($user->subscribed($planeName)) {
    return response()->json(
        ['message' => 'You have already subscribed to this plan!'], 403);
  }


  // get plan priceId
  $planPriceId = $this->plans[$request->planId];


  // It does what it says :p
  $user->createOrGetStripeCustomer();

  try {
    // subscribe user to plan
    $subscription = $user->newSubscription($planeName, $planPriceId)
                        ->create($request->paymentMethodId);


    if ($subscription->name == 'standard') {
      $user->assignRole('standard-user');

    } else {
      $user->assignRole('premium-user');
    }

    return response()->json(
        ['message' => 'Subscription was successfully completed!'], 200);


  } catch (IncompletePayment $exception) {
    return response()->json(['message' => 'Opps! Something went wrong.'], 400);
  }
}
Let's make the billing view
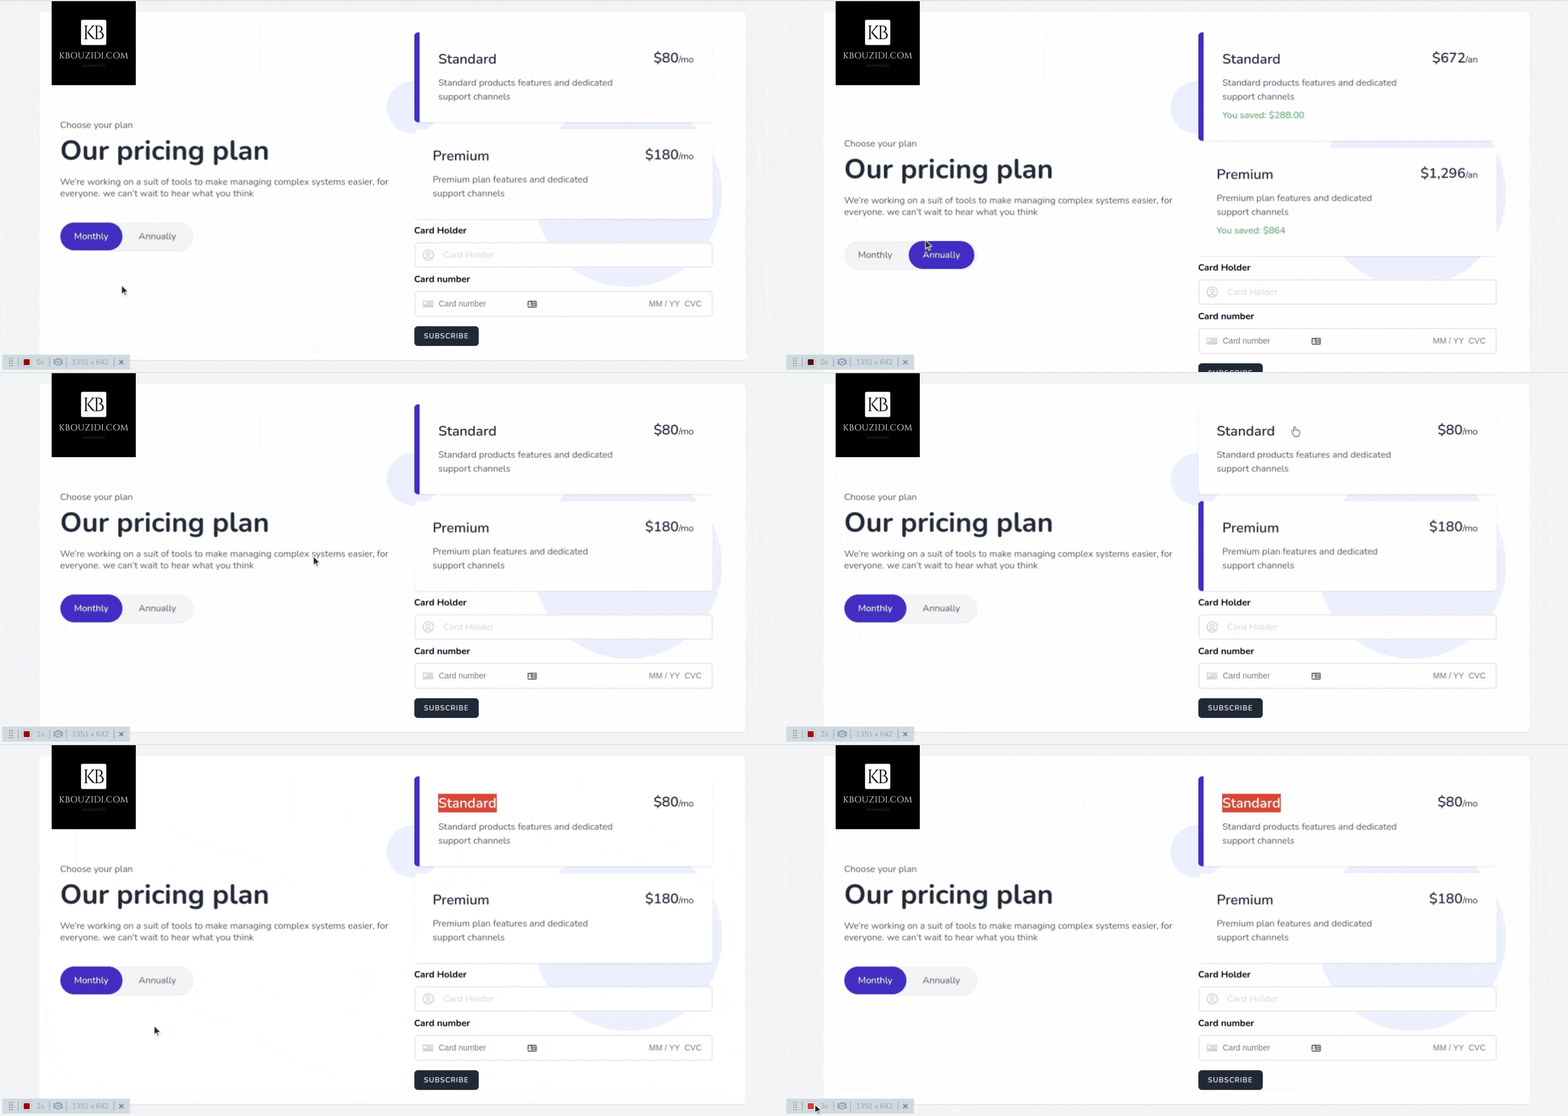
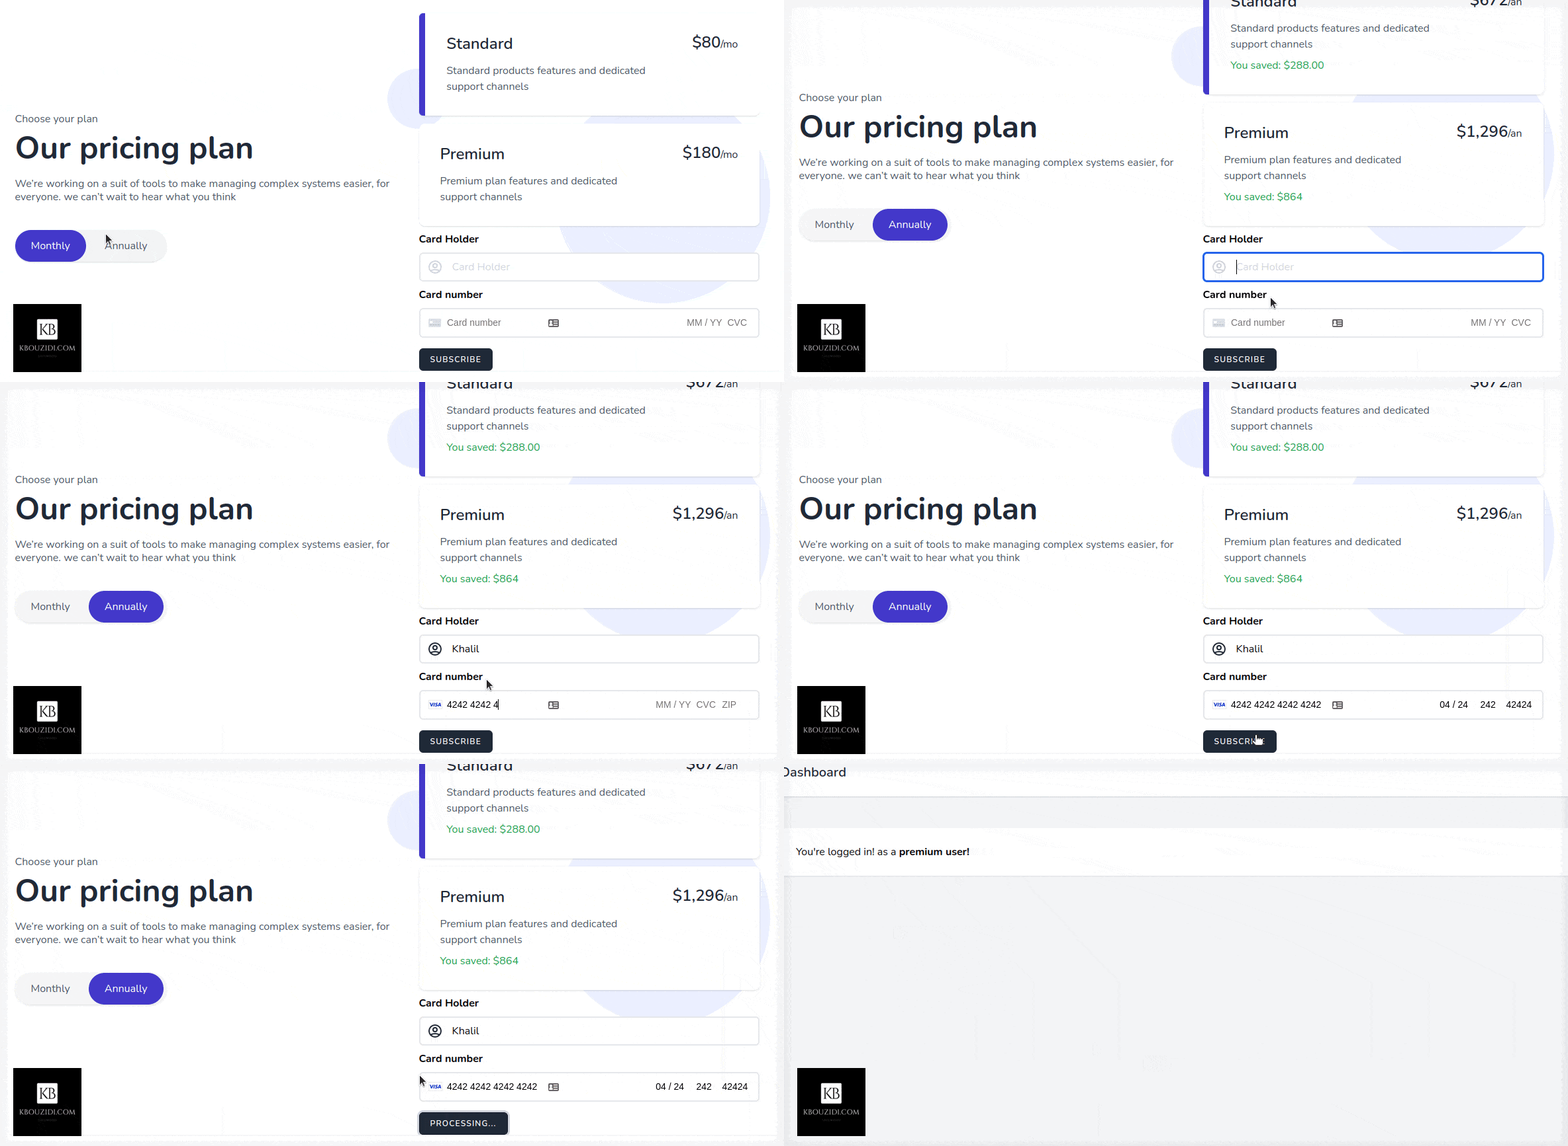
I did use this Tailwindcss snippet Template with a bit of AlpineJs magic 🪄 we got this.

Add Stripe elements
<script src="https://js.stripe.com/v3/"></script>
<script>
        const stripe = Stripe('{ {env("STRIPE_KEY")} }');

        const elements = stripe.elements();
        const cardElement = elements.create('card');

        const cardButton = document.getElementById('card-button');
        const clientSecret = cardButton.dataset.secret;
        const cardHolderName = document.getElementById('card-holder-name');

        cardElement.mount('#card-element');
</script>
In the HTML we need an input for the card name holder and a div with the id "card-element"
<input id="card-holder-name" class="..."
type="text" name="card_holder" placeholder="Card Holder" />
<div class="..." id="card-element"></div>
We need to create a setup Intent and pass it to the view
Route::get('/dashboard', function () {
    return view('dashboard',[
        'intent' => auth()->user()->createSetupIntent()
    ]);
})->middleware(['auth','isSubscribed'])->name('dashboard');
Here we are passing it as a button attribute "data-secret"
<x-button x-text="processing ? 'Processing...' : 'Subscribe'" @click="subscribe"
class="mt-4" id="card-button" data-secret="{{ $intent->client_secret }}">
  Subscribe
</x-button>
Handle the subscribe button click
When the button is clicked we will call the subscribe method which will use the stripe SDK to call the confirmCardSetup method with the clientSecret as an argument so we can check the card information without they hit our server 🔒.
Stripe will then return a setupIntent if the card is valid, then we will be able to access the user payment_method id that we will send to our back-end to charge the customer.
async subscribe() {
  this.processing = true
  const {setupIntent, error} = await stripe.confirmCardSetup(clientSecret, {
    payment_method:
        {card: cardElement, billing_details: {name: cardHolderName.value}}
  });

  if (error) {
    this.errorMessage = error.message
    return;
  }

  let response = axios.post('', {
    'paymentMethodId': setupIntent.payment_method,
    'planId': this.selectedPlanId,
    '_token': '',
  });

  response.then(response => {
    this.successMessage = response.data.message
    location.reload()
  })

  response.catch(({response}) => {this.errorMessage = response.data.message})

  response.finally(() => this.processing = false)
}
After the post request to the subscribe route, we will trigger location.reload() to redirect the user to the appropriate section with the help of the isSubscribed middleware.

Last Part: Add Features
We have two features, standard users can manage tasks and premium users can manage tasks and events.
Let's create these features
php artisan make:model Task -crmf

php artisan make:model Event -crmf
ℹ️ : f will generate a model factory
I used factories to seed data and I made a simple API CRUD for tasks and events nothing fancy you can check the code and my GitHub repo.
Let's add the routes
Route::name('subscribed.')
    ->middleware(['auth', 'role:standard-user|premium-user'])
    ->group(function() {
      Route::view('subscribed/dashboard', 'subscribed.dashboard')
          ->name('dashboard');

      Route::resource('tasks', TaskController::class)->middleware([
        'permission:list tasks|edit tasks|create tasks|delete tasks'
      ]);

      Route::resource('events', EventController::class)->middleware([
        'permission:list events|edit events|create events|delete events'
      ]);
    });
We are protecting these features with permissions check using laravel-permission middleware.
add features to the view
We'll just talk about how to list tasks and events, you can add more features.
@can('list tasks')
<div x-data ="{
  tasks: [],
  async init() {
  this.tasks = await (await fetch('/tasks')).json()
  }
}" class='basis-1/2''
  <ul>
     <template x-for='task in tasks' :key='task.id'>
        <li x-text='task.name'></li>
     </template>
  </ul>
</div>
@endcan
@can('list events')
<div x-data ="{
  events: [],
  async init() {
  this.events = await (await fetch('/events')).json()
  }
}" class='basis-1/2''
  <ul>
     <template x-for='event in events' :key='event.id'>
        <li x-text='event.name'></li>
     </template>
  </ul>
</div>
@endcan
Now you can check if the user has that permission or not you can also use policies to have more control: like limiting standard users to create a certain number of tasks like 3 or 5 or whatever you got the idea 😉.
Youpi 🎉🥳 now have your own saas app.
Before you go to LinkedIn and start writing CEO / Mister Big Boss / Ninja ...
make sure to listen to this Podcast from Jeffrey way first 10 Business Tips When Launching Your First App.
The demo project will be on my GitHub Safemood.
I'm willing to make a demo project for every article so subscribe to my newsletter for more 🚀.
If you have a question or even a tip for me, you can find me on Twitter or LinkedIn.
